
So you want to solo mine LiteCash? Check out the step-by-step instructions below. You should be familiar with the Windows command line interface.
We tried to make the instructions as simple as possible. If there are any improvements you feel we can make please feel free to comment on this post or let us know on Telegram, Discord, or Reddit!
Creating and Installing Certificates
- Go download OpenSSL and install it (use defaults).
- Navigate to C:\Program Files\OpenSSL-Win64\bin and right click openssl.exe and select “Run as Administrator”
- At the OpenSSL prompt paste the following:
- req -x509 -sha256 -nodes -days 365 -newkey rsa:2048 -keyout stratum.key -out stratum.crt

- Press Enter
- Fill in the requested information. The important part is the common name (name of the pc running the miner and node)
- Go back in to C:\Program Files\OpenSSL-Win64\bin and you will find stratum.crt and stratum.key. Remember this for later.
- Right click on the certificate.crt file and select Install Certificate
- Follow the prompts on the certificate import wizard as show below.


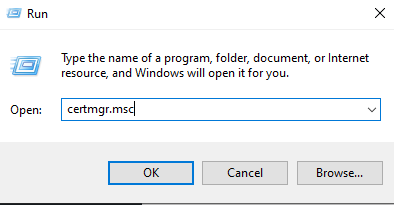
- Now right click the start menu, select run, and type in “certmgr.msc”
- This opens up the Windows certificate manager. Under Personal > Certificates you can see the newly installed certificate.


Download and Install the Wallet
- Now that you have the certificate click here to download the LiteCash wallet CLI (command line interface). Be sure to choose the 64bit or 32bit depending on the architecture of your OS. We need this as it requires a full node with a custom configuration to work.
- Now extract the zip file you just downloaded to your location of choice (it doesn’t really matter where).
- Now open a command prompt (right click on the start menu, select run, type in CMD, and press enter)


Initialize A New Wallet and Generate A Permanent Address
- In the command prompt window, navigate to the folder you extracted the wallet to. You will see all the files you need to get the node and wallet running.
- To initialize the wallet type the following and hit enter
-
litecash-wallet --command=init
- Choose a password and then confirm it
- Write down the seed phrase and make sure you secure it. This is the only way you can recover the wallet in the event of any issues.
- Note – A wallet address is generated but we will not use this one as it expires after 24hrs.

-
- Now we need to generate a permanent address so that we can continue to mine to the same address and not have to worry about it expiring and losing mining profits.
- Type the following at the prompt.
litecash-wallet --command=new_addr --expiration_time never
It will ask you for the password you created in step 2.

- To verify the new address type the following.It will ask for you password again.
litecash-wallet --command=address_list

- Make note of the address that is set to never under expiration date.
- Type the following at the prompt.


Get the Owner and Miner Key From Your Wallet. The owner and miner key will be used in the node configuration file.
- At the command prompt run the following. Make sure to copy this key.
-
litecash-wallet --command=export_owner_key

-
- At the command prompt the following to get your miner key. Make sure to copy this key.
-
litecash-wallet --command=export_miner_key --subkey=1

-


Set up and configure your local node.
- In the same directory as you extracted the wallet to earlier, fine litecash-node.cfg. Open this in a text editor (notepad, notepad++, etc).
-
-
-
- Find the line in the file that says something similar to below.
# port to start server on
# port=10000 - Uncomment the line port =10000
# port to start server on
port=10000 - Now find the line that says the below:
# number of mining threads(there is no mining if 0)
# mining_threads=0 - Uncomment the line for mining_threads set the value to 8 (or less if your have less threads available on your CPU) and add verification_threads=8 (or less if your have less threads available on your CPU).
# number of mining threads(there is no mining if 0)
mining_threads=8verification_threads=8
- You will also need to make sure your note is pointing to a seed node so it can update itself with the blockchain information.
# nodes to connect to
peer=explorer.lite-cash.com:10000
peer=ca1.lite-cash.com:10000 - Now find the below and fill in the information accordingly, using the owner key, miner key, and key password (if you set one). Make sure to remove the # mark at the beginning of each line as below.
# Owner viewer key
owner_key=<owner key here># Standalone miner key
miner_key=<miner key here># password for keys
pass=<password here> - You will also need to set up a port so that your miner can connect to the node. Look for the line that starts with stratum_port and set the value to whatever you like. 11001 is just an example.
# port to start stratum server on
stratum_port=11001 - Now find the line that starts with stratum_secrets_path, configure it as the following and then copy stratum.key and stratum.crt and place them in the same directory that you have the wallet and node files in.
# path to stratum server api keys file, and tls certificate and private key
stratum_secrets_path=. - Here is an example litecash-node.cfg file.
- Now that you have the configuration file completed you can either run the node from the command prompt by typing in litecash-node.exe or double clicking the .exe in Windows explorer.

- Take note that this node will need to fully sync with the blockchain before you can continue to the next step. As you are synching you will see messages in the terminal screen that indicate your progress.
-
-
-


Download and configure the mining software.
- Go to Gminer’s GitHub page and download version 2.33.
- Extract this file wherever you like.
- Open the gminer folder and find the mine_beam.bat file. Rename it to mine_cash.bat (or whatever you want to).
- Open the file in a text editor and edit it like the below. Make sure to specify the port that you configured as stratum_port previously. Also replace <address> with the wallet address you previously created.
miner.exe --algo beamhashI --server 127.0.0.1 --port 11001 --ssl 1 --user <address>
- Now you can double click on the .bat file that you just created. If all is well and the configuration is correct, you will see the below.

Point your wallet to your local node.
- Open litecash-wallet.cfg in your text editor and find the line that starts with node_addr= and change it to the below.
node_addr=127.0.0.1:10000
LiteCash requires your wallet to be “always on” to receive coins you will want to go back in the command prompt (to your LiteCash wallet directory and type in the following:
litecash-wallet.exe --command=listen
As long as you leave this running in a terminal, the wallet will remain on to receive any coins that you have mined.

How to check your balance! Run the below command at the command prompt:
litecash-wallet.exe --command=info

As noted above let us know if there is anything missing or any improvements we can make!
~ The LiteCash Team